I already covered soapUI in one of my previous blog posts. As I still use this tool quite often and extremely excited about it, I would like to share more testing scenarios we as a developers can use on day-by-day basis. The ones for today's post would be: testing web services and Java RMI services.
So first thing first: let's assume we are developing application which exposes web services and our goal is to have some integration testing in place. We don't want to hard-code SOAP requests and responses, we want to leverage Groovy to code real test cases. Thanks to soapUI, it's so easy to do by using Groovy test steps. Let me omit the routine and focus on bare bones details. I created a simple test project in soapUI with this structure:

- from GroovyWS project: groovyws-0.5.2.jar
- from Apache CXF project distribution (I use version 2.4.0): cxf-2.4.0.jar and neethi-3.0.0.jar
import groovyx.net.ws.WSClient

def properties = testRunner.testCase.getTestStepByName( "Properties" )
def service = new WSClient( properties.getPropertyValue( "url" ), this.class.classLoader )
service.initialize()

def token = service.login(
 properties.getPropertyValue( "username" ),
 properties.getPropertyValue( "password" )
)

assert token != null, "Login is not successful"
Properties step just contains username, password and url configuration:

Second use case: testing Java RMI services. This one requires a bit more work to be done. First of all, you need soapUI to be run using RMISecurityManager. Let's do this.
- Create file soapui.policy with content below and store it in <soapUI home>\bin:
grant { permission java.security.AllPermission; }; - Change soapUI command line (<soapUI home>\bin\soapui.bat). Find the line set JAVA_OPTS=... and append to it:
-Djava.security.policy=soapui.policy -Djava.security.manager=java.rmi.RMISecurityManager
So you will have something like this: set JAVA_OPTS=-Xms128m -Xmx1024m -Dsoapui.properties=soapui.properties "-Dsoapui.home=%SOAPUI_HOME%\" -Djava.security.policy=soapui.policy -Djava.security.manager=java.rmi.RMISecurityManager
- from application, the JAR file which contains Java interface contract for RMI service under the test
- from Spring Framework project distribution (I use version 3.0.6): aopalliance-1.0.jar, spring-beans-3.0.6.RELEASE.jar, spring-core-3.0.6.RELEASE.jar, spring-context-3.0.6.RELEASE.jar
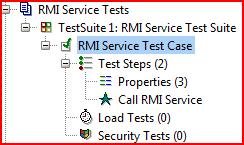
import org.springframework.remoting.rmi.RmiProxyFactoryBean
import com.example.RmiServiceInterface

def properties = testRunner.testCase.getTestStepByName( "Properties" )
def invoker = new RmiProxyFactoryBean(
 serviceUrl: properties.getPropertyValue( "url" ),
 serviceInterface: com.example.RmiServiceInterface
)
invoker.afterPropertiesSet()

def service = invoker.object
def token = service.login(
 properties.getPropertyValue( "username" ),
 properties.getPropertyValue( "password" )
)

assert token != null, "Login is not successful"
Now our service is ready for more serious testing. As with web services scenario Properties step just contains username, password and url (RMI) configuration:


